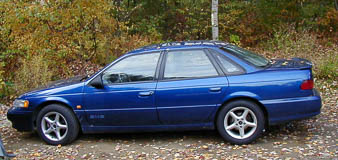
Changing the alternator on a 1994 SHO
I had a somewhat unusual alternator failure: one or more bearings went, and twice in one day I heard an awful screeching noise, the car labored and the battery light went on. Also, some accessory belt was squealing and
starting to smoke. The car didn't actually stall, and the squealing stopped after 10 to 20 seconds, but after the second time, I figured either the alternator or air conditioning compressor had seized up. Just in case,
I had the climate control on VENT all the way home.
When I did get home, I listened to the engine with the hood up and even on VENT, something was making noise; turning on the air conditioning didn't increase the noise. I happened to have a cheap Sears mechanic's stethoscope
and verified that the alternator was making lots of noise so I figured that was the problem.
The next morning I called up the local NAPA and ordered a rebuilt alternator (their online catalog lists several different ones, but the one I got cost $209 from my local
store plus $69 core charge). I know some people strongly suggest getting your alternator rebuilt so you know it will fit, but not knowing where the local friendly alternator rebuilder was, I ordered the rebuilt (sorry, George!)
and picked it up the following morning.
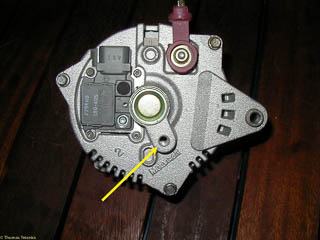
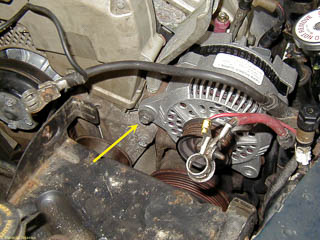
It's useful to look at the replacement alternator to get an idea of what you have to remove to get the old one out of the car. There's a cast in mounting bracket on the right. There's a similar bracket on the front of the alternator
at the lower left that doesn't show in this photo. The arrow points to a tapped hole where a third bolt holds the alternator in place. Getting to this bolt is what will cause all the problems.
Replacing the alternator in a car with a smaller engine is a piece of cake: there's lots of room to get to everything (compared to a SHO, I think I could practically climb into the engine compartment of my 66 Mustang with an inline
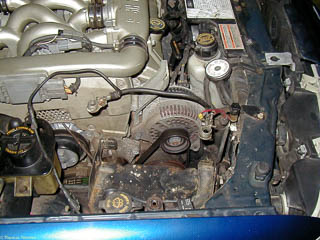
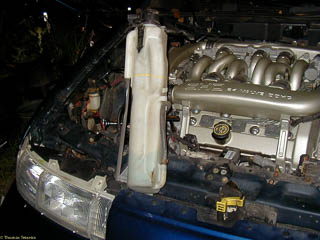
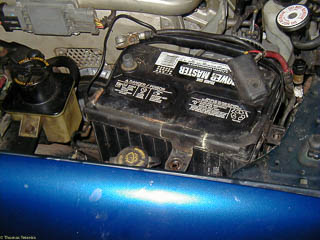
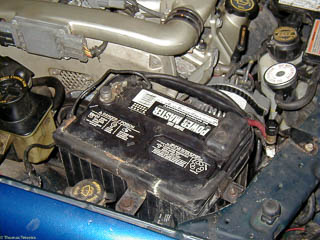
six cylinder). But even though the SHO actually has less engine displacement than that Mustang, there's much less room and you have to take stuff out to get at the alternator. Step one is removing the battery: step one
for just about everything is removing the battery (or at least the negative battery cable) according to the factory shop manual. As you can see, removing the battery does get you access to the front of the alternator and
the drive belt.
The next step is removing the drive belt from the alternator. This is actually easier, in my opinion, on the SHO than on cars where the belt tension is maintained by pivoting the alternator. But you do have to know how to get the
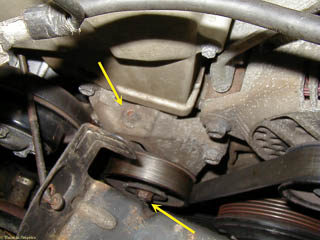
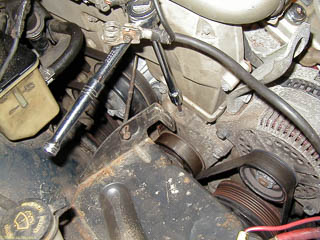
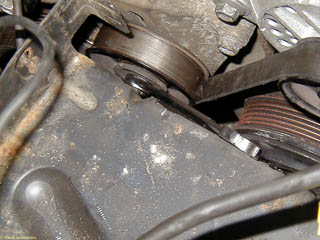
tension off. This picture shows the bolt with the 5mm allen head that adjusts the tension on the idler pulley, and the nut on idler pulley itself. You first need to loosen the nut or you'll just back the adjustment bolt out
without loosening the tension.
I just used a 3/8" ratchet with an extension and a 5mm hex drive to loosen the drive belt. 'Loosening' the bolt loosens the tension. It wasn't difficult to get this ratchet in there, but I did have to be careful to not scrape up
the intake manifold (my ratchet has one of those knurled 'quick turn' knobs at the top).
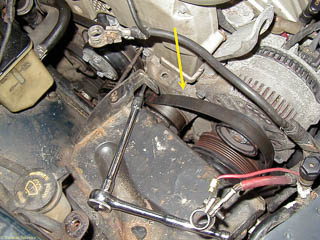
Since the idler pully naturally settles down, loosening the adjustment bolt doesn't immediately get you slack on the belt. It does, however, allow the idler pulley to be raised which does give you plenty of slack.
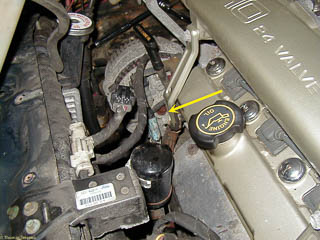
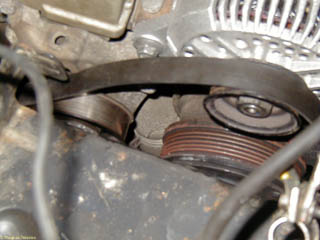
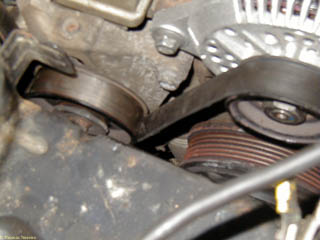
However, I found it easier to slip the drive belt above the idler pulley and then remove it from the alternator pulley: I didn't have enough hands to hold the idler pulley up to release the belt tension
and also slip the belt off the alternator. The arrow here shows the belt above the idler pulley.
Now we shift to the back side of the alternator. I removed the cover over the radiator that contains emission information and also shows how the accessory drive belts are routed. The main thing this does is get better access to
the bolts holding the radiator overflow bottle in.
I had never removed the overflow bottle before. I was surprised at how tall it was!
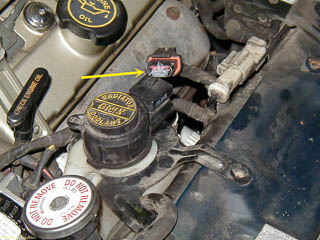
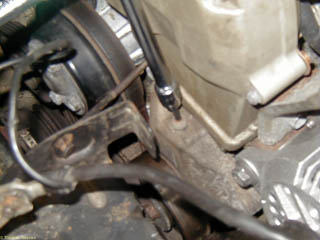
I rearranged these pictures, but to completely remove the overflow bottle, unhook the tube from the fitting on the radiator filler tube. This is much easier than trying to balance the overflow bottle out of the way and worrying
about spilling antifreeze everywhere (the antifreeze is corrosive and if you do spill some, you should rinse it off well).
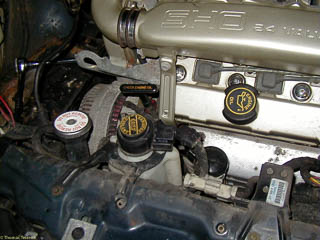
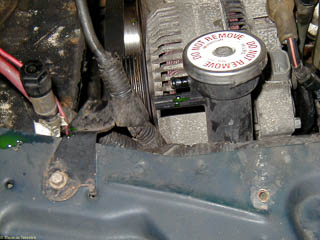
With the coolant overflow out of the way, we can see the back of the alternator better. The arrow points to that bolt I mentioned back at the beginning. You can see it, but there's still not a lot of access. Someone else said they
removed the intake manifold bracket, but I decided I had removed enough extraneous stuff at this point.
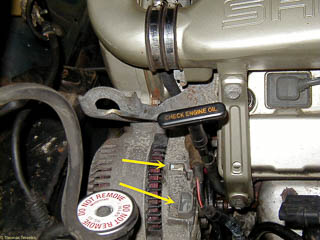
The arrows here point to where the alternator cables used to be. Okay, this may not have been as helpful as showing the cables there, or showing how I got them off. In retrospect, I should have had my wife taking pictures. Then
again, if the tear down had gone badly, my wife doesn't like being within ear shot of the expletives that often seem required in working on cars.
In any case, I used a small screw driver to carefully pry the plastic retaining clips off the cables on these two connectors. Maybe because it was a warm night, I succeeded without breaking the clips off
(yet).
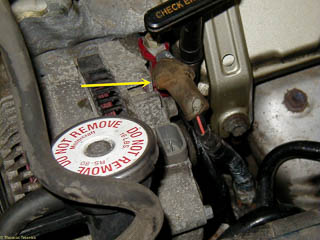
There's one more wire to remove. First you have to peel back this plastic hood. The wire itself is held on with a nut. This wire has to take the main output from the alternator (up to 130 amps on 1994 MTXs) back to the battery.
This is a much better design than what Ford had on my 87 MT-5: the plug on connectors had a tendency to work loose, get a bad connection and overheat.
Okay. After you remove this cable, it's time to unbolt the alternator. I removed the tough bolt at the back first. As I remember, it was a 12mm bolt and a combination wrench would just fit in, but a socket wouldn't. The bolts on
the front are 14mm. I removed the shorter bolt closer to the front of the car first, and then the very long bolt last. I did have to maneuver the alternator past the radiator filler cap and out by the battery opening,
but this was much easier than something like maneuvering the air conditioning compress clutch plate back into place.
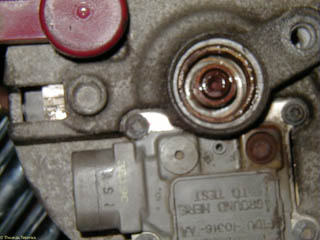
When I got the old alternator out, it was clear that the bearings were, in fact, gone. While slightly out of focus, you can see that the dust cap is missing, and I was able to easily move the rear of the alternator shaft back
and forth. At first I thought that dust cap must have got loose first and that let dirt into the alternator bearing, but I now think that when the bearing went, the screeching, grinding and vibration may have knocked
the dust cap loose.
What I'm not going to show is moving the drive belt pulley from the old alternator to the new one: I don't know why it is, but alternators either come with the wrong pulley, or don't come with any pulley. This one didn't have
any pulley. I tried for a few minutes to get the old pulley off with a breaker bar for 1/2" drive socket and trying to hold the pulley in the vise, but this was clearly going nowhere fast. Since I don't have an impact
wrench (definitely the weapon of choice for this task), I packed it in for the evening and deputized my wife to take both alternators to the friendly local garage where an impact wrench made short work of that pesky nut. Maybe
some braver soul can comment on whether the starter motor trick used to loosen the crankshaft pulley would also work on the alternator.
Now this is the point where the Helms manual generally says "installation is the reverse of removal", and it is, but I took pictures of that too.
Here's the new alternator in place. The arrow points to the head of the long bolt that holds the alternator. I guess in other applications, the alternator would pivot on this bolt to tension the drive belt. I put antiseize compound
on the threads of this bolt and the other bolts holding the alternator in place since they seemed to be going into aluminum. You can see that this front bolt isn't tightened down yet so it would be easy to get the other bolts
into position.
I did the bolt in the back next since this looked like it would be the hardest to get lined up. In fact, it was quite easy to get this bolt in. This picture shows all the cables backon the alternator, and if you look at the larger
image, you can just see the front bolt in place too. The alternator came with a small tube of dielectric grease which I put into both of the push on plugs before attaching them to the connectors. There was enough grease
left so I put some on top of the nut, under the other boot, although I don't think this is necessary.
Next I dropped the overflow bottle back in place. This picture shows the dielectric grease on that connector before I plugged it in. The radiator cover goes on after this since one of the bolts for cover goes through the right
hand hold of the overflow bottle bracket.
This picture should look familiar: here's the accessory drive belt wrapped loosely around the alternator pulley and lying on top of the idler pulley.
Lift up the idler pulley and slip the drive belt underneath. Make sure the belt engages the grooves in the alternator, air conditioning compressor and crank shaft pulleys.
Now use the 5mm hex head driver to tighten the belt tension. I'm sure there's a formal spec on what the tension should be and a special tool to measure it. I just used my hand to see how hard it was to deflect the belt a half
inch or so and making sure it seemed about as tight as before. I know you shouldn't put too much tension on the drive belt as that in turn will put stress on all the bearings (alternator, idler pulley and air conditioning compressor).
After you get the belt tension adjusted, make sure you tighten the bolt on the idler pulley! I used the box end of a combination wrench for this. I suppose if I had removed the battery tray instead of just the battery, I could have
got a socket wrench down in there instead.
The battery is back in place, ready to bolt in the hold down bracket.
Everything connected, and tightened down and ready to go! Make a last check for things like the ground wire which can be dressed to the left hand battery hold down bolt, and make sure the coolant overflow tube is connected up also.
